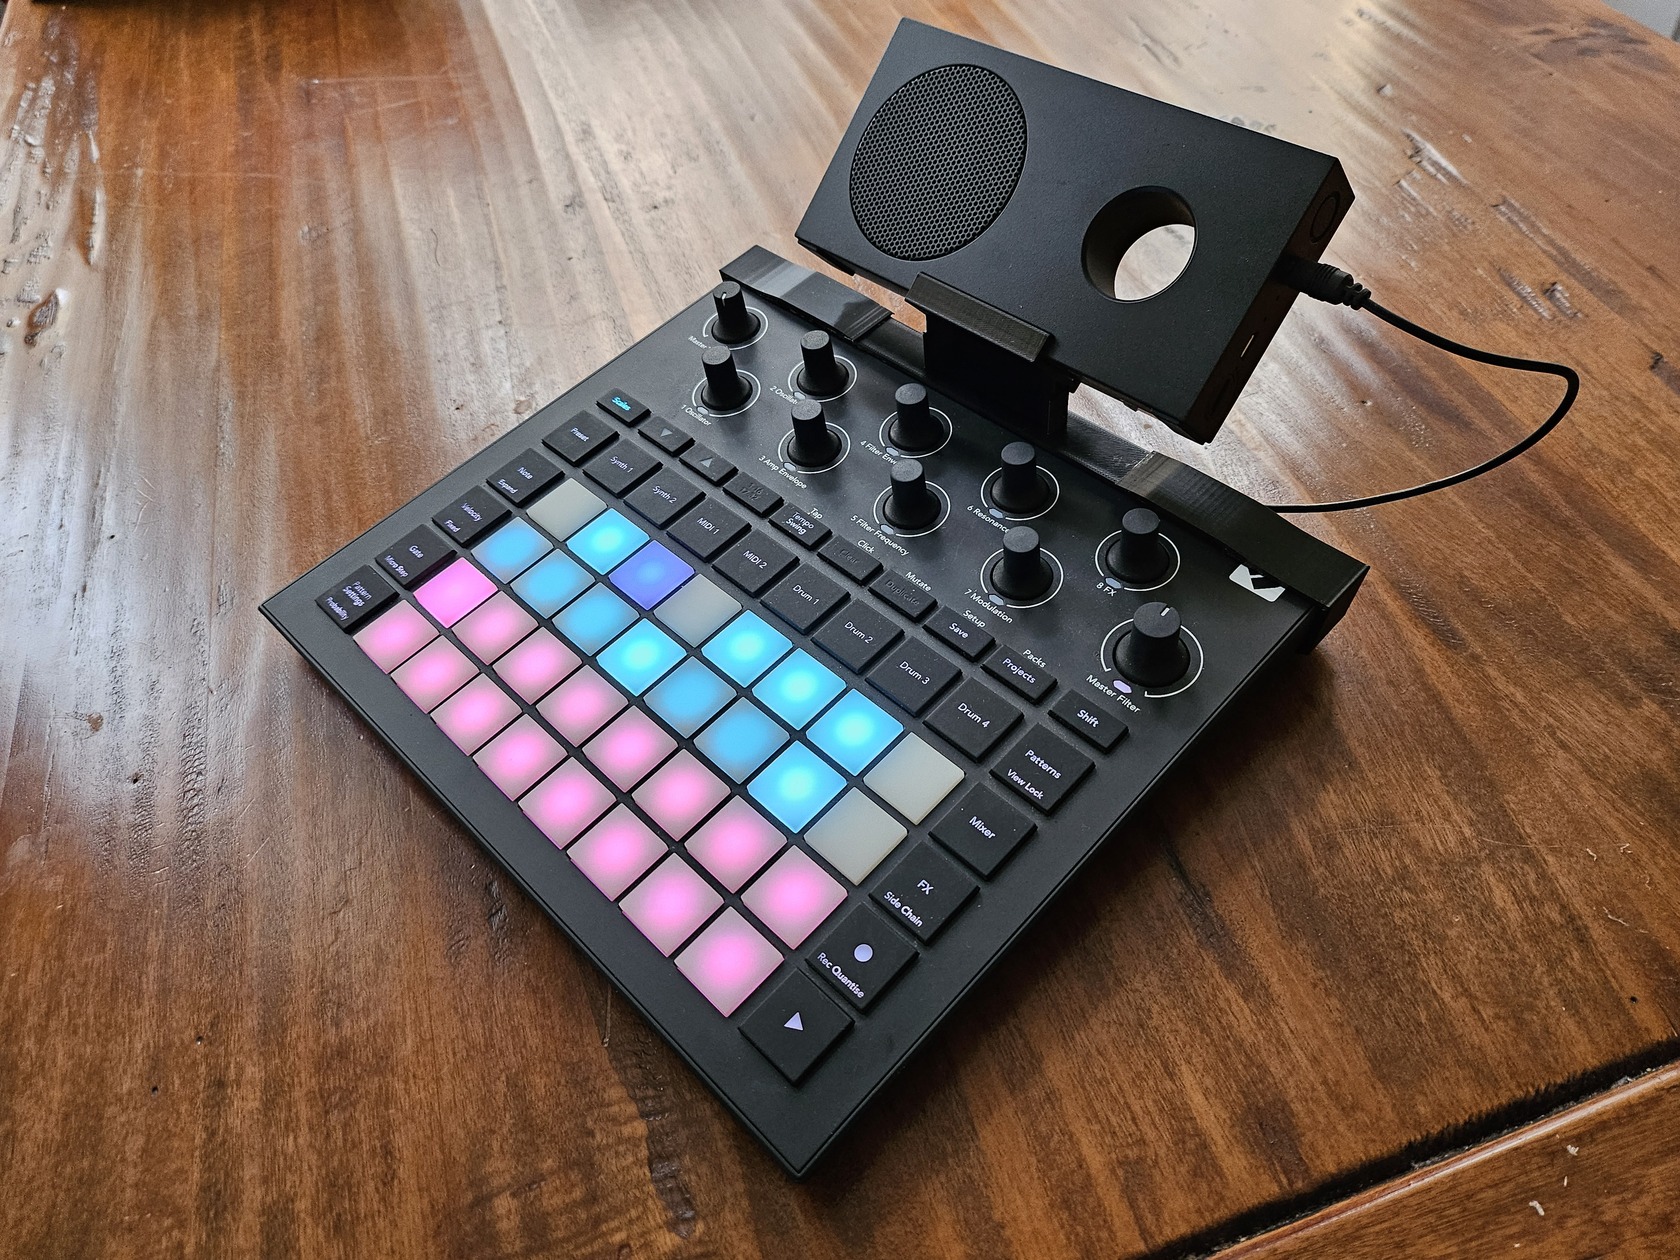
Novation Circuit Tracks speaker holder for IKEA Eneby Portable
This funky groovebox has been sitting in my drawer for a couple of years, as to mess around with it means to plug it into the soundsystem, which is a task you don’t want to undergo every time some hardbass beats need to be dropped in the moment of divine inspiration.
TL;DR: You can check it out here https://www.printables.com/model/763991-novation-circuit-tracks-and-ikea-eneby-portable-sp.
The previous model (Novation Circuit) has at least some (yet horrible) speaker, so to overcome this I’ve decided to create something with my hands (and calipers and angle meter and Prusa Mini) after long time of procrastination.
My proposed remedy for the jam-hungry owners of Circuit Tracks popped up in my head when the IKEA Eneby Portable black (https://www.ikea.com/au/en/p/eneby-portable-bluetooth-speaker-black-00476210/) was in front of my eyes every day (sitting on the shelf in my t-shirts closet) for couple of months. I’ve realized that it is an ideal external speaker for this – battery operated, matching color and design, with reasonable sound characteristics and low cost.
The process of creating this was challenging as the Tracks is a box with non-regular angles all around the place. Fitting everything in, so the groovebox is still playable, yet the speaker holding still with all the connectors in the back being easily accessible wasn’t an a piece of cake I’ve imagined. Also, the solution is printable even on Prusa Mini – that’s the reason for the odd topology – so it fits to any 18cm printbed. The construction below supports even click-on adapters for other external speaker of your choice, so you can tune it up further.
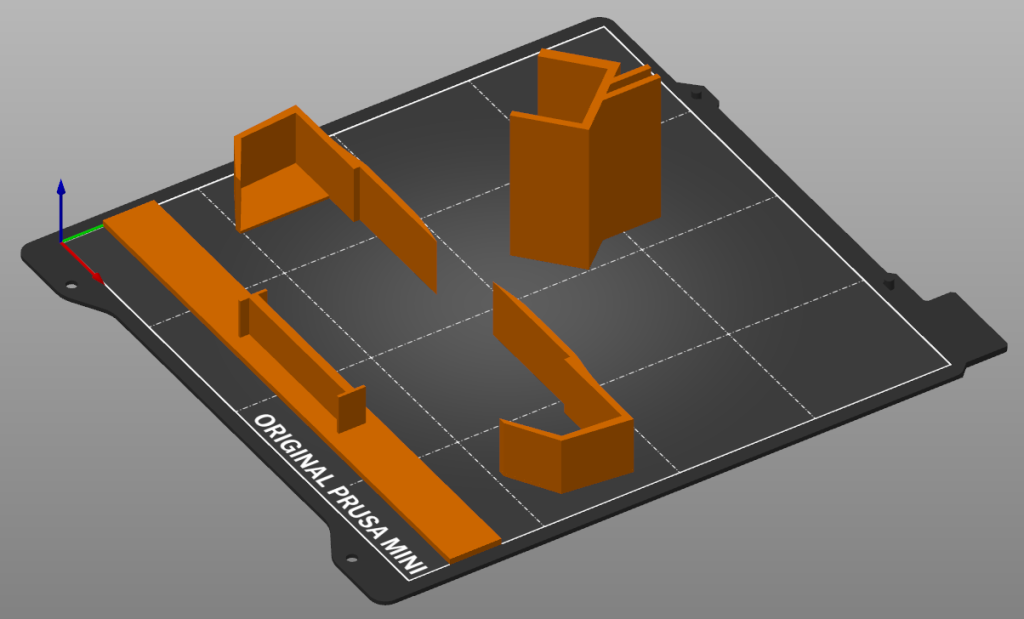
Instructions:
- Print all the parts with black PLA separately
- Put the L/R corner part to your Circuit Tracks and hand-tune the positioning of the long beam (with the speaker adapter and speaker put in), so you can fit your fingers between the upper row of knobs of the Circuit and the speaker
- Glue the L/R corner together with the long beam, let it set
- Hand tune the other corner position while on the Circuit Tracks, again glue together (ideally using clamps), let it set
Note: the pieces L/R corners and the long beam don’t match exactly the width of the Circuit Tracks – there is like 1mm space on each side, you need to tune the position manually as described in the steps above - Take a thicker paper rectangle and put it between the Eneby speaker and the adapter (the vertical side) so the speaker really holds there – as the 3D print is not micron-perfect, it is better to have prints a little bit bigger and put some paper there for proper fit
- Get some short TRS 3.5mm jack cable, connect and switch on the beasts
- PROFIT!
Check out the resulting sound experience below (no postprocessing) with a little track snippet of mine:
Download the model files below, if you don’t like the corner pieces, I’ve even attached the original SVG file, so you can tune the shape as you wish: